How to Write a Game Prompt That Gets AI to Build Exactly What You Imagined
AI can turn a written idea into a playable experience faster than traditional development, but the quality of the result depends heavily on the quality of the instructions.
A vague request such as “make a fun action game” leaves too many decisions to the system. It does not explain what the player controls, how the game is won, what creates difficulty, how the screen should look, or which features matter most.
The AI must guess, and those guesses may produce something very different from what you imagined.
A strong game prompt works more like a compact design document. It clearly defines the player’s role, central mechanic, controls, rules, progression, visual direction, and technical limitations. It also separates essential features from optional ideas so the system knows what must work first.
This guide explains how to write precise game prompts, avoid common mistakes, and improve generated results through focused iteration.
Why Vague Prompts Produce Generic Results
Artificial intelligence responds to the information it receives.
When a prompt contains only a genre and theme, the system may rely on familiar patterns. A request for a racing experience may generate basic movement, checkpoints, and a timer. A request for a puzzle may produce matching pieces or simple grid interactions.
The result might function, but it may not reflect your specific idea.
Weak prompts usually fail because they do not explain:
- What the player repeatedly does
- What makes the mechanic distinctive
- How the player succeeds
- What causes failure
- How difficulty changes
- Which controls are required
- What visual style is intended
- Which devices should be supported
- Which features should be excluded
The more important a detail is, the less you should expect the AI to guess it correctly.
Begin With a One-Sentence Player Experience
Before writing a long prompt, define the experience in one sentence.
Use this structure:
The player controls ______ and must ______ while dealing with ______.
For example:
The player controls a delivery robot and must transport packages across moving platforms while avoiding environmental hazards.
This sentence establishes three essential elements:
- The player’s role
- The main objective
- The central source of challenge
A clear player-experience statement prevents the prompt from becoming a collection of disconnected features.
Do not begin with menus, graphics, or monetization. Begin with what the player actually does.
Define the Core Gameplay Loop
The core loop is the sequence of actions players repeat throughout the experience.
A simple loop might be:
- Enter a challenge.
- Perform the main action.
- Avoid or overcome a threat.
- Earn a reward.
- Improve or unlock something.
- Begin a harder challenge.
Write this loop explicitly in the prompt.
For example:
The player enters a short level, collects three energy cells, avoids moving traps, reaches the exit, earns points based on completion time, and unlocks a more difficult level.
This gives the AI a clearer understanding of how the game should flow from beginning to end.
Without a defined loop, the generated experience may contain mechanics that work individually but do not create a satisfying reason to continue.
Explain the Main Mechanic in Detail
The central mechanic deserves more detail than any other feature.
Do not simply write:
Add a jumping mechanic.
Explain:
- How the action is triggered
- How the action should feel
- What limits it
- What feedback it produces
- How it affects the challenge
A better instruction would be:
The player can perform one responsive jump using the spacebar or an on-screen button. The jump should have a short upward movement, predictable landing, and clear animation. The player cannot jump again until touching the ground.
This removes several possible misunderstandings.
When the mechanic depends on timing, aiming, balancing, matching, or resource management, explain the expected behaviour precisely.
Specify the Player Controls
Controls should never be left entirely to assumption.
Include:
- Movement inputs
- Action buttons
- Camera behaviour
- Touch controls
- Restart controls
- Pause controls
- Device support
For example:
Use the left and right arrow keys for movement, the spacebar for jumping, and R for restarting. On mobile, provide two movement buttons and one jump button. Keep the camera centred on the player and follow smoothly without shaking.
Controls affect the entire experience. A technically correct project can still feel poor when movement is delayed, buttons are unclear, or the camera behaves unexpectedly.
Someone using an AI game maker should define both the input and the intended feeling of the response.
Describe Success and Failure Conditions
The AI needs to understand when a round, level, or session ends.
Define success clearly:
- Reach a destination
- Defeat all enemies
- Survive for a certain time
- Earn a target score
- Complete a puzzle
- Collect required objects
- Manage a resource successfully
Then define failure:
- Health reaches zero
- Time expires
- The player falls
- An objective is missed
- A resource is exhausted
- Too many mistakes occur
Include what happens afterward.
For example:
When the player completes the objective, show the score and a next-level button. When the player fails, show the reason for failure and provide an immediate restart button.
A restart should usually be fast. Requiring the player to return through several menus can weaken replayability.
Define Difficulty Progression
“Make it challenging” is too vague.
Explain how the challenge should increase.
Difficulty can grow through:
- Faster obstacles
- More enemies
- Less time
- Smaller safe areas
- More complex patterns
- Fewer resources
- Stronger opponents
- Additional mechanics
- Harder decisions
A clear instruction might say:
The first level should introduce one slow obstacle. Each later level should increase obstacle speed and introduce one new pattern. Do not add multiple new mechanics in the same level.
This produces a more controlled learning curve.
Difficulty should test skills the player has already had an opportunity to learn. Randomly increasing every value may create frustration rather than meaningful challenge.
Tankor Arena
Tankor Arena is a combat arena game where players control tanks and fight waves of enemies or other players in battle zones. A suitable prompt should define tank movement, turret aiming, shooting controls, projectile speed, enemy-wave behaviour, arena boundaries, health, damage, victory conditions, upgrade choices, and whether the first version is single-player or competitive.
Separate Essential Features From Optional Features
One of the most useful prompt-writing techniques is dividing requirements into priority levels.
Essential Features
These must work in the first version:
- Player controls
- Central mechanic
- Objective
- Success and failure
- Basic interface
- Restart system
Secondary Features
These improve the experience but can be added after the core works:
- Progression
- Multiple levels
- Additional characters
- Sound effects
- Visual polish
- Difficulty settings
Future Features
These should not distract from the first build:
- Multiplayer
- Large content libraries
- Advanced customization
- Account systems
- Achievements
- Complex economies
This structure prevents the system from attempting too much at once.
When you ask AI to implement ten major features simultaneously, it may produce a broad but unstable result. Begin with the smallest version that proves the central interaction.
Give Clear Visual Direction
Visual instructions should be specific enough to create consistency without becoming overloaded.
Include:
- Perspective
- Art style
- Environment
- Colour mood
- Interface style
- Character proportions
- Animation feel
- Level readability
For example:
Use a clean 2D side-view style with simple geometric environments, strong contrast between the player and obstacles, minimal background detail, and a clear interface showing score and remaining time.
Avoid using only subjective words such as beautiful, amazing, modern, or professional.
These words do not explain what the result should look like.
A visual direction becomes stronger when it describes observable features.
Explain the Camera and Screen Layout
Camera instructions are especially important for action, platforming, racing, and exploration projects.
Specify whether the camera should be:
- Fixed
- Side-scrolling
- Top-down
- First-person
- Third-person
- Isometric
- Smoothly following
- Limited to an arena
- Zooming according to action
Also define important interface placement.
For example:
Use a top-down camera that shows the entire arena. Place the health indicator in the upper-left corner, the score in the upper-right corner, and the restart button on the result screen only.
A strong screen layout reduces confusion and helps the generated build feel intentional.
State What the AI Must Not Add
Negative constraints are often as important as positive instructions.
You may need to say:
- Do not include multiplayer.
- Do not require account registration.
- Do not use realistic violence.
- Do not add dialogue.
- Do not create an open world.
- Do not use complex inventory systems.
- Do not add advertisements.
- Do not change the control scheme.
- Do not add features outside the listed scope.
Without exclusions, the system may introduce familiar genre features that are unnecessary for your concept.
A focused prompt tells the AI what to leave out.
Define the Intended Platform
A project designed for desktop may not work well on mobile.
State:
- Target device
- Screen orientation
- Browser or downloadable format
- Keyboard, mouse, touch, or controller support
- Expected session length
- Performance expectations
For example:
Build this as a browser-based desktop and mobile experience. Use landscape orientation. Keep sessions between three and five minutes. Use simple visuals so the project loads quickly on average phones.
A game maker online may support multiple publishing formats, but the prompt should still identify the primary audience and device.
Use Measurable Instructions
Measurable instructions produce more predictable results than subjective ones.
Instead of:
Add many enemies.
Write:
Begin with three enemies and add two more in each wave.
Instead of:
Make the round short.
Write:
Each round should last no longer than 90 seconds.
Instead of:
Give the player some health.
Write:
Give the player 100 health points and make each basic enemy attack remove 10 points.
Numbers can be adjusted later. Their purpose is to remove ambiguity from the first build.
Do Not Write One Giant Unstructured Paragraph
A long paragraph makes requirements harder to interpret.
Use clear sections such as:
- Concept
- Player role
- Core loop
- Controls
- Mechanics
- Objectives
- Difficulty
- Visual style
- Interface
- Audio
- Platform
- Restrictions
This format also makes revision easier.
When the controls are wrong, you can update only the controls section instead of rewriting the entire prompt.
A structured prompt works like a compact brief for a game builder, helping both the creator and the system stay focused.
Use a Prompt Template
A reusable template saves time and improves consistency.
Use the following structure:
Game Concept
Describe the experience in one or two sentences.
Player Role
Explain what the player controls.
Main Objective
State what must be achieved.
Core Loop
List the repeated actions in order.
Controls
Define every important input.
Main Mechanics
Explain the central systems and how they interact.
Success and Failure
State exactly when each occurs.
Difficulty
Explain how the challenge increases.
Visual Style
Describe perspective, environment, colours, and interface.
Audio
Define essential sound effects and music direction.
Platform
State target devices and orientation.
Restrictions
List features the AI should not include.
First-Build Priority
Tell the AI to complete and test the core loop before adding optional systems.
This template can be used whether you want to make your own game from an original idea or quickly test a small variation.
Build in Stages Instead of Requesting Everything at Once
The best AI workflow is usually iterative.
Stage 1: Core Prototype
Request only:
- Movement
- Main action
- One objective
- One challenge
- Restart
Stage 2: Gameplay Improvement
Add:
- Better feedback
- Difficulty progression
- Scoring
- Basic sound
- Interface improvements
Stage 3: Content Expansion
Add:
- More levels
- Additional obstacles
- New abilities
- Progression
- Visual variation
Stage 4: Polish
Improve:
- Animation
- Audio
- Loading
- Accessibility
- Menus
- Performance
Trying to build a game in one prompt often gives the AI too many priorities.
Staged instructions make it easier to test each system before introducing another.
Tell the AI What Must Remain Unchanged
When requesting revisions, protect the systems that already work.
A weak revision prompt says:
Make the game harder and improve the controls.
A stronger prompt says:
Keep the current level layout, scoring, interface, and visual style unchanged. Increase enemy movement speed by 15 percent after the second round and reduce the player’s turning delay. Do not change any other mechanics.
This reduces accidental changes.
AI systems may reinterpret the entire project when given broad instructions. Clear preservation rules make iteration safer.
Test the Generated Result Like a New Player
Do not assume the prompt worked because the project runs.
Test:
- Whether the first action is obvious
- Whether controls match the instructions
- Whether success is possible
- Whether failure is understandable
- Whether restarting works
- Whether the difficulty changes correctly
- Whether interface text is readable
- Whether mobile controls fit the screen
- Whether optional features appeared unexpectedly
Take notes while testing.
Separate issues into:
- Prompt misunderstanding
- Technical error
- Weak design decision
- Missing feedback
- Balancing problem
Not every problem requires another large prompt. Small focused corrections are often more effective.
Use Player Feedback to Improve the Prompt
Creators already understand their own concepts, which makes them poor judges of initial clarity.
Ask several new players to test the result without explanation.
Observe:
- What they try first
- Which controls they misunderstand
- Where they hesitate
- Whether they recognize the goal
- Why they fail
- Whether they restart
- What they believe should happen next
Then revise the prompt according to actual confusion.
For example:
Testers did not notice the objective. Add a short instruction at the beginning and highlight the target for three seconds. Keep all other systems unchanged.
This is more useful than requesting general improvement.
Avoid Prompting With Contradictory Requirements
Conflicting instructions can produce unstable results.
Examples include:
- Make the experience relaxing and extremely fast.
- Keep the interface minimal but show every statistic.
- Make the controls realistic and very easy.
- Add deep progression but keep sessions under one minute.
- Make the project simple but include ten complex systems.
When two goals conflict, state which one has priority.
For example:
Prioritize accessible controls over realistic movement.
This gives the AI a decision rule.
How Accessible Tools Support Better Prompting
A no-code game maker may allow creators to inspect and adjust the generated logic visually after the first result.
This is useful because not every revision needs another prompt. Some values, events, or object placements may be easier to edit directly.
People interested in making games should learn basic concepts such as conditions, variables, states, inputs, and collisions. That knowledge improves both manual editing and prompt quality.
The more clearly you understand interactive systems, the more accurately you can describe what the AI should produce.
How Astrocade Fits Into Prompt-Based Creation
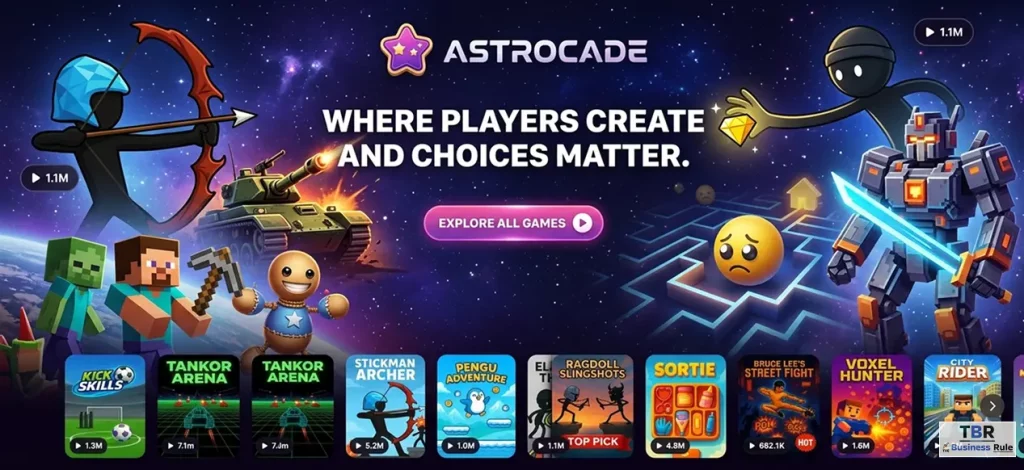
Astrocade helps creators move from written concepts toward playable experiences without requiring a traditional development setup.
Someone who wants to create a game can use a structured prompt to define the player role, central loop, controls, challenge, and intended visual direction.
Creators who search for game solutions often expect the first instruction to produce a perfect final version. A better workflow is to begin with a focused prototype, test it, and improve one system at a time.
Astrocade can shorten the distance between an idea and player feedback, but the creator still needs to make the important decisions.
The platform interprets the prompt. The creator defines the experience.
Example of a Strong Game Prompt
Here is a practical example:
Create a 2D top-down survival game for desktop browsers. The player controls a small robot using WASD and aims with the mouse. The main objective is to survive three waves of moving enemies while collecting energy cells.
The core loop is: move around the arena, avoid enemies, collect energy, activate a temporary shield, survive the wave, and choose one upgrade before the next wave.
Give the player 100 health. Basic enemies remove 10 health on contact. The shield lasts five seconds and requires three energy cells. Begin with four enemies and add two enemies in each wave.
Use a fixed top-down camera that shows the entire arena. Display health in the upper-left corner, collected energy in the upper-right corner, and the current wave at the top centre.
Use simple geometric visuals, strong contrast, and minimal background detail. Include sound effects for collecting energy, taking damage, activating the shield, completing a wave, and losing.
The player wins after surviving three waves. On failure, show the survival time and an immediate restart button.
Do not include multiplayer, inventory, dialogue, character customization, account registration, advertisements, or additional modes.
Build the movement, enemy behaviour, energy collection, shield, health, three-wave structure, victory, failure, and restart systems first. Do not add optional features until the complete loop works.
This prompt is effective because it provides clear behaviour, values, restrictions, and priorities.
Common Prompt-Writing Mistakes
Using Only a Theme
A theme describes appearance, not gameplay.
Add actions, goals, and rules.
Asking for Too Many Features
Large requests reduce consistency.
Begin with the core loop.
Leaving Controls Undefined
State exactly how the player interacts.
Using Subjective Language
Replace “cool” and “fun” with observable behaviours.
Forgetting Failure Conditions
Explain how players lose and what happens afterward.
Ignoring Device Requirements
Define platform, screen orientation, and input method.
Revising the Entire Project Repeatedly
Change one system at a time and protect working features.
Expecting AI to Fix Weak Design Automatically
AI can implement instructions, but it cannot guarantee that the central idea will be enjoyable.
Final Thoughts
A strong game prompt is not a wish. It is a clear design instruction.
Begin with the player’s role and central objective. Define the core loop, controls, success, failure, progression, visual direction, platform, and restrictions. Use measurable values where possible and separate essential systems from optional features.
Build in stages. Test every version. Protect the systems that already work. Use player behaviour to identify what needs to change.
The goal is not to write the longest possible prompt. It is to remove the most important sources of ambiguity.
When your instructions clearly explain what the player does, how the systems respond, and what the first playable version must contain, AI has a much better chance of producing what you actually imagined.